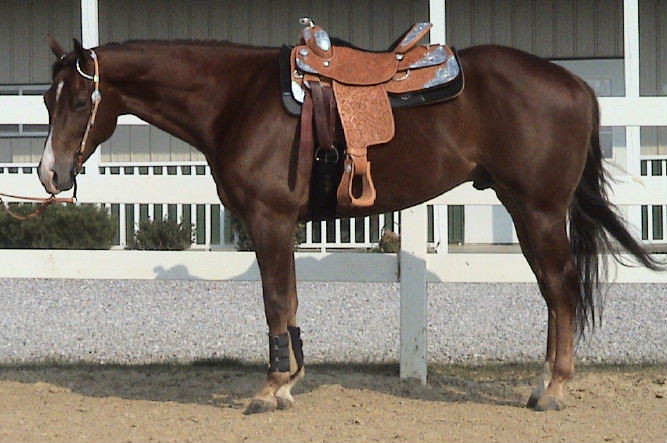
 Correctly Positioned
western saddle
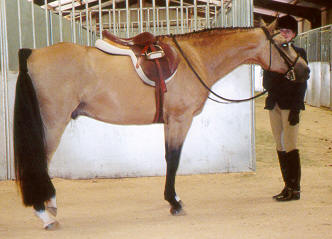
Correctly Positioned
western saddle
Level III Study Page
This online lesson program is not intended to be a substitute for riding lessons, instead is is intended to be a thorough introduction for non-riders and a valuable educational tool to riders. Horses can be unpredictable at times and can cause harm to inexperienced handlers, please seek a professional instructor or trainer when applying your knowledge learned during this online lesson program.
1. Correct tacking up procedure (western tack)
Horse should be tied securely or held by a helper. Approach horse from its left side (also known as the near side). Standing near the horses shoulder (always making sure horse is aware of your position slowly place saddle pad (thick pad used under saddle) on horse's back, front of pad should be in front of withers. Saddle pad must be lying smoothly without wrinkles. Place saddle on pad, making sure not to disturb pad while placing saddle on top. Go to right side (off side) of horse and let cinch down from keeper and make sure saddle pad is lying correctly and smoothly under saddle. Return to near side and carefully reach under horse and grasp cinch and bring towards you (you may hook stirrup to horn on near side to allow for easy access to cinch). Take latigo (strap that attaches girth to saddle on near side) down from keeper and run down through cinch ring. Bring latigo up through ring and down through ring again ~ slipping the buckle tongue through a hole in the latigo strap. Latigo strap should be snug. Saddle should be retightened immediately before mounting.
2. Know correct tacking up procedure (hunt seat tack)
Horse should be tied securely or held by a helper. Approach horse from its left side (also known as the near side). Standing near the horses shoulder, slowly place saddle with saddle pad attached on horse's back. At this time make sure that saddle pad is not wrinkled. Still on near side attach girth to billet straps on lowest holes, use the end of the girth that has elastic straps. Quietly go to off side and carefully reach under horse and grasp girth. Attach girth to billet straps snugly. Go to near side and tighten more snugly, the elastic straps will allow you to tighten girth more easily on near side. Leave stirrups run up as in picture below until you are ready to mount.
3. Explain leads at lope/canter.
As a horse travels at a lope or canter one front leg reaches out farther than the other. This is called the lead leg. Horses traveling to the right should lead with their right front leg. In addition the horse's hind right leg will reach further forward than the horse's left leg. A horse that is cantering on the correct lead in front while on the wrong lead behind is referred to as cross-firing. If the rider intentionally wants to be on the "wrong" lead it is called counter-cantering. Counter-cantering can be requested in horsemanship and hunt seat equitation classes.This horse is on the the right lead (notice how the inside front leg is reaching further than the outside front leg)
4. Know the difference in a turn on the forehand and turn on the haunches
Turn on forehand - Horse's front end is stationary while the hindquarters move, often used in hunt seat equitation, and trail classes Turn on hindquarter ~ Horse's hind end is stationary while front end moves. Used in horsemanship, trail, and reining patterns (also referred to as spins, pivots, 90, 180, or 360 degree turns).
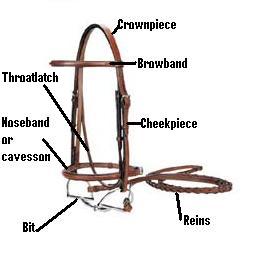
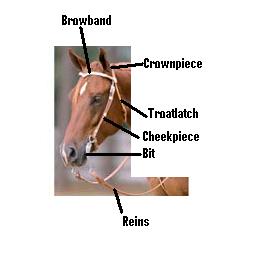
5. Know the parts of the bridle (hunt seat and western)
6. Explain correct method of tying horse
When tying a horse always use a halter and lead rope, never tie your horse when it has a bridle on. Always tie your horse to a solid object intended for this purpose. Do not tie to anything that a horse could pull loose. Always use a quick release knot, as described below.


![]()
![]()
![]()